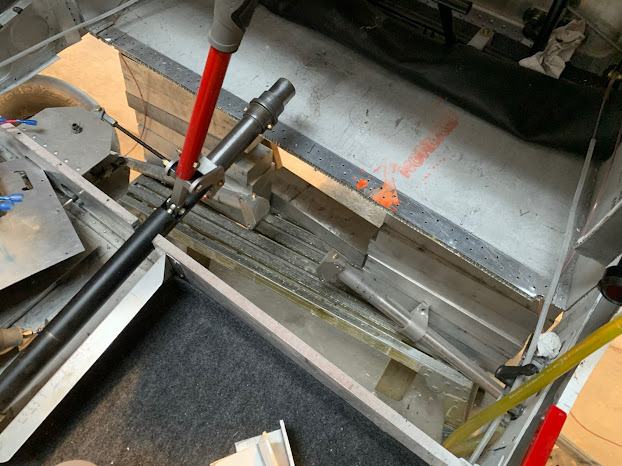
I'm working on upgrading my landing gear bulkhead. Jumping right in, this is how things look after I've removed the broken parts.The leftover angles are still visible, but I removed them later. It was easy to remove the fuel lines on the right hand side, but the rudder cable was a stickier wicket. I ended up cutting it at the thimble, and will reuse the same line and install longer stainless straps to resolve the shortened cable. Also in this photo, I've not yet removed the bottom aluminum. After everything else is done, I will re-sheet that section.
This is the left side of the work area. The 1/8" material remained bent. It had reached yield load but not ultimate. After consultation with CW, I concluded to leave it. The new angle was clamped and bonded into place, and the new top and bottom bolt holes are substantially to the left o the existing holes. The new middle bolt hole is centered between the old holes.
Right hand side with old angle finally removed.
Now, I drill out rivest and cut out the bottom skin. I should have done this earlier, it makes everything easier.
Cocoa cuddle break.
Unused rivet holes are filled with epoxy. This restores the integrity of the HC. Do the same with unused bolt holes.
It would be better NOT to drill out the outer skin, but I did. Use something (for instance, a very small allen wrench) on an electric drill to clear out ALL of the honeycomb for an area equal to or greater than a fender washer. Pot all holes with high tensile epoxy compatible with aluminum. JB Weld original formula; 3M 2216 are good choices. I did it when the hangar was very cold so it made it easy to do with masking tape and no dripping. YMMV. My glue wasn't runny. It was glop.
This is new required procedure for all bolts going thru HC.
Same thing from the inside. You can see the epoxy which has oozed through the drill holes.
The top angle is bonded into position, as the are the left and right side attach angles. All surfaces between bulkheads and angles need to be heavily roughed (grinder or 60 grit), cleaned, attached using appropriate metal bonding epoxy.
Here's the left angle, which was machined to fit, partially bolted in place. The red wire is power going to the flap and droop linear servos. Not all bolts are done. The lower angle (which is impossible to see) is not yet in place.
The right angle bonded and partially bolted in place.


No comments:
Post a Comment