
Stupid Pilot Tricks...
I had just installed the new oil thermostat in my Chipper 2. I pulled the plane out of the hangar, eager for a break in the routine. (I was early in the process of installing shock absorbers on the plane.) It was a beautiful afternoon, the sky was blue, the grass was green, and the plane was gorgeous.

As usual, my UL350iS powered up without a hitch. My goal was simply to warm up the engine and check oil pressure & temps. The process of warming up was taking a long time (it was a little chilly) and I advanced power while keeping the brakes engaged. This went on for several minutes. I edged the power up a bit more. My brakes were having a hard time keeping the plane from creeping forward. I'd ease back on the power, hold the brakes a little tighter, and advance power again.
All of this was extremely poorly thought out.
After advancing power again, the plane started to list to the left and settle down to the ground, like it was kneeling. Realizing that a prop strike was imminent, I retarded throttle. The tip of the prop cut into the soft grass and dirt, carrying through several blades before all became silent.
I broke my plane.
I did not take a picture. I was flaming mad. My hangar mates swiftly emerged from a hangar backroom, having heard the commotion, and walked towards me as I got out of the kneeling airplane and looked at one gear leg bent backwards. I realized that I had twisted the gear attach bulkhead. (The gear leg was not hurt.)
Then I realized I had forgotten to re-install the trailing links, so I had just ripped my gear out because of my forgetfulness.
With the help of my friends, we rolled the wounded bird back into the hangar.
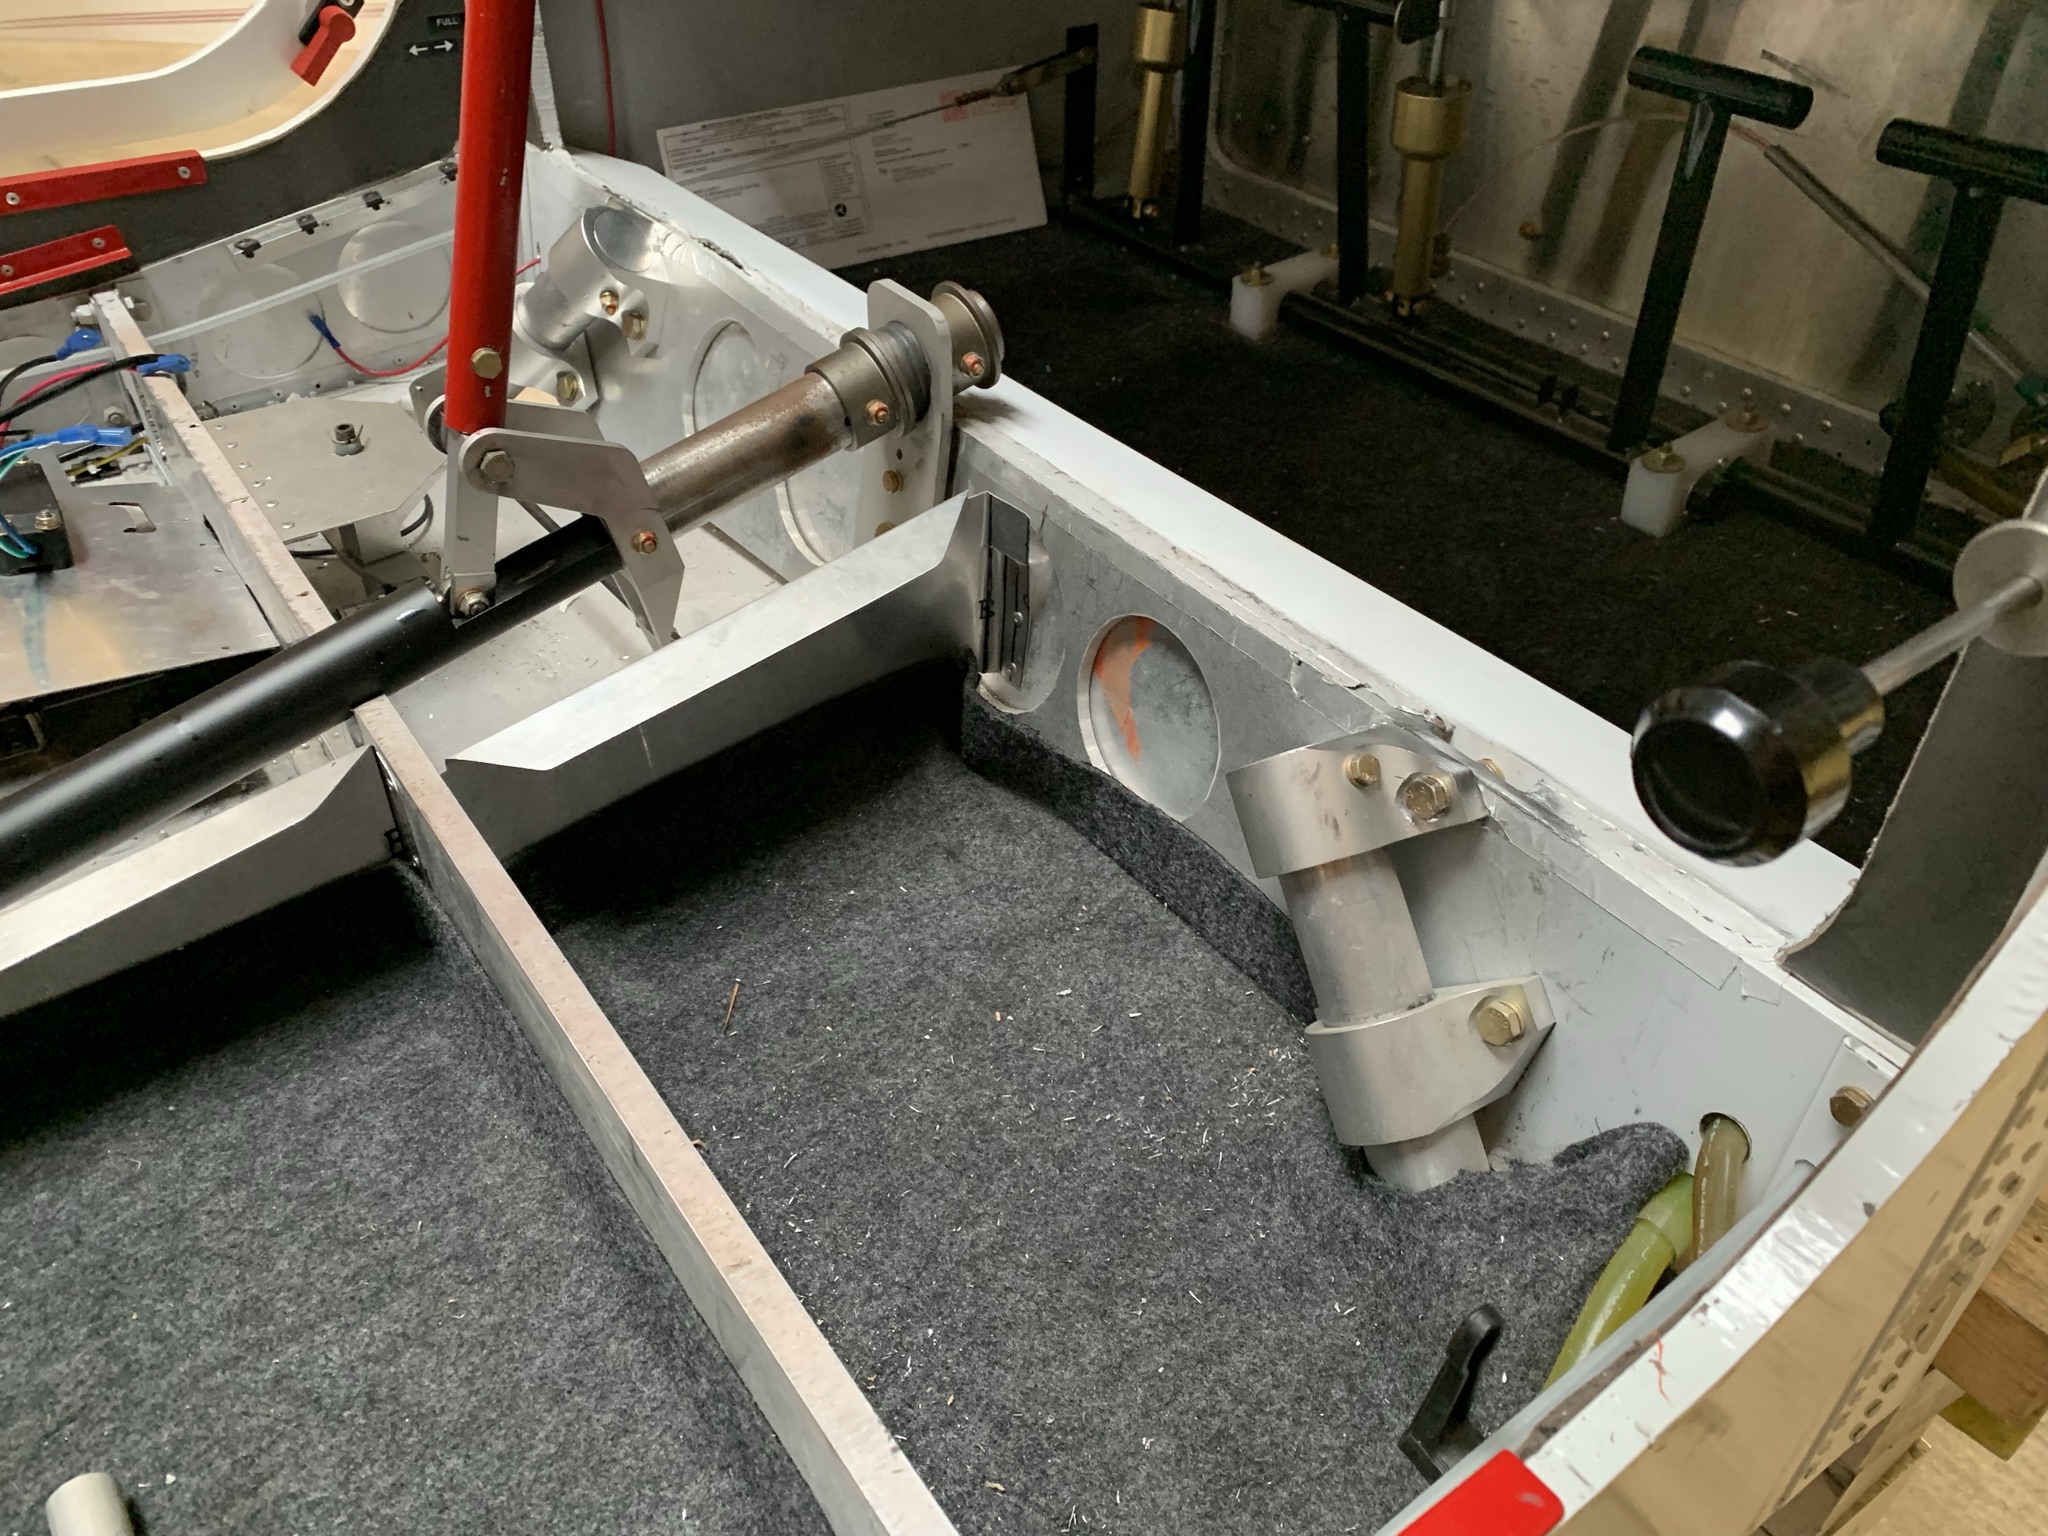
The inside of the cockpit looked like this:
And after several days of drilling out rivets, chopping out aluminum bulkhead, and cutting / pulling / fussing / fuming, the removed bits looked like this:

Over the course of the Thanksgiving holiday, I will be stepping you through what I have learned on how to repair this problem in my Chipper. I have also been using this opportunity to solve some other problems.
1) Improved bulkhead assembly for potentially higher gross weight
2) Shock absorber installation for potentially higher gross weight
3) Improvements in mounting techniques for bolts in honeycomb
4) Improvements in bonding techniques
5) General proof that this structure is repairable
And as I head into the Thanksgiving break, things are much improved. Here's a photo of how things were looking earlier this afternoon.

Live & Learn.
1 comment:
James I guess you now know why I recently asked a question as to whether you were going to strengthen under the cowling/forward fuse, while you were doing your previous mod!
Post a Comment