In 2020, the NTSB released a final report on my 2018 accident in Alaska. Just about everybody missed this publication. The NTSB certainly makes no announcement of the publication of a routine GA report. It is buried within the Carol system, which is an accident database query system which the NTSB uses. If you know the details, you can find the report.
Ironically, the NTSB identified my airplane, N3748, as a Pipper, not a Chipper. The story behind this is well worthy of another article and involves the first, forgotten name of Chipper, and a threatened lawsuit from Piper Aircraft causing the name change Pipper --> Chipper. But there you have it; technically N3748 was a Pipper, not a Chipper. Knowing that detail helps ease the discovery of the NTSB document.
Another piece of required reading is the earlier post,
Standard Pilot Blog: The Curious In-Flight Engine Failure of N3748 in Alabama (jameswiebe.blogspot.com)
...which details the catastrophic failure of the upgraded Rotax 912UL engine while returning from a successful Sun N Fun show in Florida.
I will get to that NTSB report in due course, please keep reading.
After the failure in Alabama, N3748 was trucked to Wichita for repairs and additional upgrades to the Rotax. To my recollection, it received a different crankshaft, a new cam, and new pistons / cylinders from Edge Performance. An Edge Performance rep flew in from Canada to Wichita to perform the work.
After the work was performed, this forgotten video was made:
Chipper STOL Test Flight on Vimeo
And I left for Alaska. Along the way, some strange engine behavior was observed, causing me to pause the journey in Watson Lake, Yukon Territories for engine work.
Watson Lake is famous for its sign forest.
And I met another Chihuahua, which reminded me of my dog, Cocoa.
Yeah, I know that's not why you are reading this. Back to the point. With the help of the FBO, I explored why the engine was running rough sometimes. We looked at the carbs, because of some known issues with sinking floats. (This was not the problem, but we looked.)
And we looked at the chip detector. The crazy thing is that nobody seemed particularly alarmed.
After doing some things, the engine ground tested smooth running again, and I continued the flight to Alaska. For those of you that have flown the Alaska highway, been to Tok, seen 40 Mile Air, here's some memories.
Finally, arriving at Lake Hood (Anchorage) very late in the evening. It was a phenomenal experience. The dusk conditions, clouds and mountains made everything surreal.
Yeah, I'm still working towards that NTSB report.
Over the course of the next couple of weeks, I gave demo rides, exhibited at the Alaska Airman show, met Steve Riedel in person and discovered that he was a pilot.
(He and his daughter Emily are recurring characters in one of the Gold shows.)
While flying close to Anchorage, the engine started to run extremely rough. I consulted with a local mechanic and he indicated that conditions were prime for Carb ice. I agreed with the conclusion.
Later, the engine started to run rough again and I did a precautionary landing at a military base. After a few minutes on the ground, everything returned to normal, and N3748 went back to Lake Hood.
At that point, I fully involved a local mechanic in conjunction with tech support from Edge. They suspected a fuel flow issue, so we rebuilt the fuel lines. My fuel system included an electric pump which could force gas into the carbs. We had equipment for testing fuel pressure. At some point, my mind concluded that the engine was using gas faster than what could be supplied, so I repitched the prop for lower horsepower. Finally, the engine ran OK.
In hindsight, I do not believe the carbs on the 80HP engine were up to feeding gas to the cylinders at the 122HP rate of the upgrade. Perhaps I'm getting ahead of myself. My speculation as to why this didn't happen until I got to Alaska is easy to understand: it was the first time that the engine upgrade was flying close to sea level, along with cold temps, causing the density altitude to plummet, and the gas requirements to rise.
On the afternoon of May 23, after an extended and successful ground ops check of the engine, I taxied to the Lake Hade gravel airstrip, which is on the same extended area of Anchorage airport. The gravel strip and the adjoining lake support GA traffic for the thousands of small airplanes based in Anchorage. The control tower gave approval for takeoff, and I advised that I would be closed pattern. I climbed out and made right traffic. Later that day, I was to head to Fairbanks and continue showing off Chipper.
Coming down final on this test run, everything was perfect. For reasons that are not clear, I decided to take a second trip around the racetrack, and I advised the tower of my intentions; they approved. I was climbing out at about 150' AGL when the engine went to idle power and the aircraft started to descend. Looking forward, I saw my dilemma: insufficient runway remaining for landing.
I mic'd and called tower. I don't remember my exact words, but I do remember my tone of voice: urgency, urgency, trouble. "N3748 lost engine, landing."
The tower responds: "Cleared to land."
The next sequence is like a video game, where the great big obstacle is approaching you and you're trying to figure out what can stop certain calamity. My mind is thinking slip, but it is hopeless. Suddenly, a solution emerges: touch down at the end of the runway, bounce like crazy, clear the 8' chain link fence, and land in the following bog.
It was a good plan, but it didn't work. I hit the end of the runway and bounced. The gear caught the chain link fence, N3748 stopped flying right then, the propeller spinner nose of N3748 hit the ground, all forward motion stopped in that exact moment, and the plane flipped over on its back.
I was upside down, suspended in my four point harness, looking at the swampy bog which the airplane was sitting in.
(This photo was taken a little later in the day, the wings have been cut away from the cabin.)
I could hear sirens in the distance.
I thought, "they are coming for me."
I reached down to the ground. I could feel dampness, was that fuel? Remember, I'm still upside down, in my harness.
I checked my body. I felt pretty good. Nothing broken.
I fumbled for my harness and I couldn't get it to release. The problem was my weight tension on the clasp. Forcing myself up by pushing on the roof of the cabin, the clasp popped and I dumped my body downward to the windshield; now to get out of the airplane.
The door and frame were distorted and I couldn't get the latch to pop. I put my legs into the problem and the door popped open.
I climbed out of the cabin and onto the wing. Just as I got that accomplished, two men ran up to me.
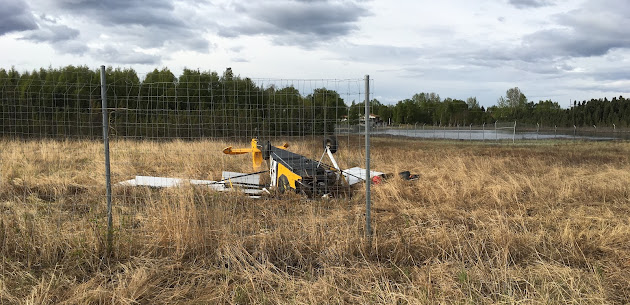
My resting spot was in a bog, over a fence, about 375 feet from the end of the runway. In the following photo, the fence was cut later to get access to the site.
You are seeing the plane in the exact spot where it hit the ground. Things stopped fairly quickly.
A lot of what happened from that point forward is very blurred. Fire trucks, ambulance, a trip to the emergency room (what a waste of thousands of dollars), NTSB investigator, Uber driver taking me to a hotel, people contacting me with offers to help, Anchorage news, Facebook comments, call to my wife: "I've rolled the plane into a ball" which wasn't true, but expressed my state of mind, trying to find an immediate commercial flight home, all flights full, frequent flyer miles, a room in a hotel, talking with Kathy at 1:45am in the morning, pleading with American Airlines to find me a way home, finding a flight to Seattle that had a seat, getting AA to fly me on miles from Seattle to Wichita, getting home, having an interview with Mike Ross (Anchorage TV news) via Skype.
From the hospital ER:
That was where my knees hit the panel, which was most of my injuries. I think I had a scratch on my head, probably from hitting the ceiling when I released the seat belt.
But there is that NTSB report.
from the report:
"Because the carburetors were not altered, it is likely that the engine was not receiving enough fuel for full power operation, which resulted in a total loss of engine power during the go-around attempt."
Here's another page from the report:
More curious stuff:
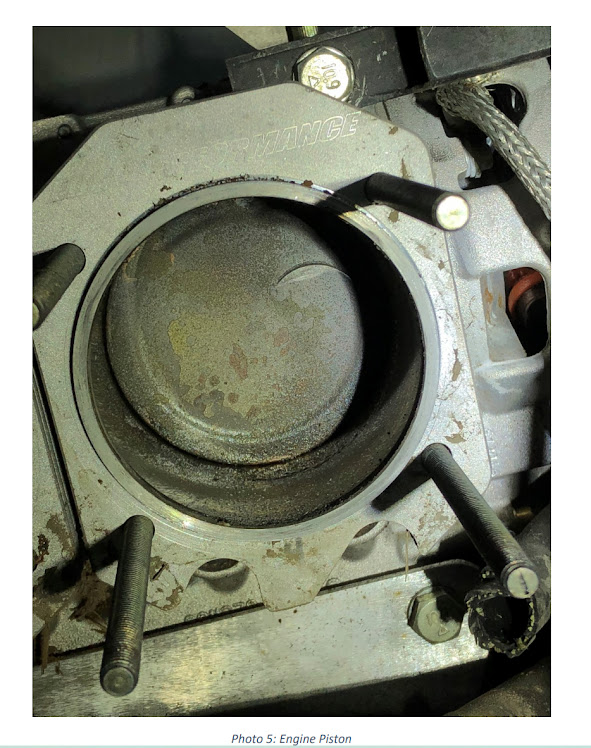
"All rocker arms exhibited discoloration consistent with high heat exposure."
"When the number 4 cylinder was removed, the valve was discovered fractured and a witness mark was present consistent with piston contact."
You can read the full text version of the NTSB report here:
I'm restarting Chipper + Ultralight work now. I dealt with this accident and then I dealt with a horrible fire. Would you be willing to help me? Then support me on Patreon:
Thanks for reading. -- James


