Showing posts with label belite. Show all posts

Monday, April 9, 2012

Calculating Center of Gravity in a Belite Ultralight Aircraft

Please note: James' blog has moved to a Wordpress site. To access it, please visit http://jameswiebe.wordpress.com/. All posts have been transferred to the new site, and all new posts will only be accessible via Wordpress. Thank you for your interest!


It's easy to calculate the Center of Gravity in a Belite Ultralight Aircraft!

*** NOTE:  This post is for taildraggers.  I have posted an additional blog entry on how to calculate CG in a tricycle gear airplane.  After reading this taildragger post, you can read the additional post on calculations for a tricycle gear plane HERE. ***

1.  Ensure that the aircraft has everything on board that should be in place for finding the empty weight and CG.  Using a level, put a support under the tailwheel and make sure that the plane is level front to back and side to side.  You'll need to lift the tailwheel off the floor by somewhere around 20 inches.  The lower door line may be used as a level line.  Here's what a level Belite looks like:

Belite Ultralight Airplane, Level, Side View

2.  With the aircraft level and all fixed equipment installed, record the scale readings and weights.  The fuel tank should be empty.

Right Wheel = ____________ Pounds
  Left Wheel = ____________ Pounds
     Tailwheel = ____________ Pounds

3.  Verify and recalculate as necessary, the ARMs for each wheel location.  This is done relative to the forward face of the firewall.  You can use a plumb bob from the firewall to mark the location on the ground, then measure back to the middle of the main wheels and the tailwheel.

Typical Main Wheel ARM = 20.6 inches (yours may vary)
Typical Tail Wheel ARM = 162.6 inches (yours may vary)

Measuring ARMS for CG calculation on ultralight aircraft

We also need to know where the pilot is located and the fuel tank.  For our sample airplane, we will assume 36.9 inches for the ARM of the pilot, and 58.6 inches for the ARM of the fuel.  You are encouraged to verify these ARMs as well.

4.  Now let's do some calculations on weights, ARMS, and moments.  We'll add in the pilot weight, and also the weight of some fuel.

Weight, ARM, moment

Right Wheel 124.7 x 20.6 = 2568.8
Left Wheel 124.7 x 20.6 = 2568.8
Pilot 200.0 x 36.9 = 6273.0
Fuel 30.0 x 58.6 = 1758.0
Tailwheel 28.2 x 162.6 = 4585.3

And let's add up the weights and moments:

In this example, the weight adds up to 507.6 pounds (with gross aircraft weight of 550 pounds, so that's good) and the moments add up to 18861.0.

Dividing total moment by total weight, 18861 / 507.6 = 37.16.  This means that the CG is 37.16 inches.  Since our aircraft has a range of 34.5 to 39.1, we are good to fly.

5.  Further exercises.

You'll want to determine CG at a variety of pilot weights (to match your own weight) and fuel conditions.   In our example airplane, the CG is 35.81 at a zero fuel condition, so the CG moves forward as fuel is consumed.

Thursday, April 5, 2012

John K Moody: Father of Ultralights

Please note: James' blog has moved to a Wordpress site. To access it, please visit http://jameswiebe.wordpress.com/. All posts have been transferred to the new site, and all new posts will only be accessible via Wordpress. Thank you for your interest!


One of the most enjoyable experiences at Sun N Fun 2012 was sharing some time with John K Moody, "the Father of Ultralights".

We talked for a while about all kinds of things:  what day he made his first powered flight; how an article in Popular Science propelled him to fame; how he started to sell them; how he made money in ultralights; how the old 20/20 news piece destroyed (unfairly) the ultralight industry... Now he is pleased to attend Sun N Fun and exhibit a trio of old ultralights, including an "Easy Riser".  It weighs only 120 pounds and flies beautifully on a Hirth engine of around 13 horsepower.

The Easy Riser used weight shift for pitch (climb/descend) control, and had a 'rudder' on each wingtip, controlled by a twist handle for each wrist.  The throttle for this bird had a mouth (YES, mouth!) mounted kill switch.  So if you wanted to kill the engine, just bite down.  John says he got shocked by this arrangement.

I took a bunch of photos of this amazing early ultralight.  Later in the day, John came by our booth and looked at a Belite ultralight aircraft.  Here's photos of the ultralight aircraft 'Easy Riser', built by John K Moody:

Easy Riser Ultralight Aircraft

Easy Riser Ultralight Aircraft

Easy Riser Ultralight Aircraft

Easy Riser Ultralight Aircraft

Easy Riser Ultralight Airplane

Easy Riser Ultralight Airplane

John K Moody, Father of Ultralights, with James Wiebe

Easy Riser Ultralight Airplane

Wednesday, April 4, 2012

Belite Ultralight Aircraft For Sale

Please note: James' blog has moved to a Wordpress site. To access it, please visit http://jameswiebe.wordpress.com/. All posts have been transferred to the new site, and all new posts will only be accessible via Wordpress. Thank you for your interest!


This aluminum ultralight airplane is available for April delivery from Belite.  It has been finished with a gorgeous cub yellow paint job.  There is no finer ultralight aircraft made by anyone! 

Taildragger Ultralight Airplane from Belite, in Cub Yellow, for sale
It still needs three days assembly work for us to finish it.  It also is ready to accept any engine, and is a legal ultralight under FAR Part 103.  It is offered with a Belite Electronics panel, with AGL, ASI, EGT/CHT, and Inclinometer.

I checked weight on it yesterday, and what you see weighs 165 pounds.  It will take about 20 pounds of material to finish it (not counting engine/mount/prop).  So any engine / prop combination of around 69 pounds or less will work.  (For this plane to be ready to fly, we need to install the interior control cables, gas tank, windshield, flying wires on the tail feathers, etc...)

This means the F33 28HP engine will work great (just like our WoW plane or the MythBusters plane).  With the F33, we would have plenty of weight allowance to put a top cowl on the rear fuselage, and make it look quite 'cub-like'.  Just a thought...

With the Hirth F33 engine, this aircraft is offered at $25,900.

Here is the 'as-configured' info

Base aircraft with aluminum fuselage ...  $16,500
Metal priming ...  $1,000
Disc brakes ... $700
Spring gear ... $400
Lightweight Lift Strut (2024T3) ... $400
Complete fabric and paint ... $6,900
     Total .... $25,900   FAF Wichita

(Electric Start / Battery / Cowling are included)

Front view of Belite Ultralight Airplane for sale
Straight on front view of Belite Ultralight Aircraft for sale
Quartering view of Belite Ultralight Airplane for sales

End view of Belite Ultralight airplane for sale
View of wing and flaperon on Belite Ultralight Aircraft for sale
Tail Feathers on Belite Ultralight Airplane for sale
Underside of Belite Ultralight Aircraft for sale, note disc brakes and spring gear
Cabin interior, note metal priming, on Belite Ultralight Aircraft for sale
This airplane would also be phenomenal with the MZ-201 45HP engine ($2900 swap), but you would also probably need to add a ballistic parachute ($3300) to make legal weight. 

Call or email us with your questions.  (316) 253-6746  or info@beliteaircraft.com

Tuesday, April 3, 2012

Incredible paint job on new Belite

Please note: James' blog has moved to a Wordpress site. To access it, please visit http://jameswiebe.wordpress.com/. All posts have been transferred to the new site, and all new posts will only be accessible via Wordpress. Thank you for your interest!


I've just loaded about 30 hi res pics to Flickr of a new customer airplane.  You can see them on our Flickr channel, here.

This is such a nice plane!

Turqoise Belite Ultralight Airplane
It was built with nearly every option -- from a nice instrument panel to a big 50HP Hirth.  It has carbon fiber spars, an aerodynamic tail, a rescue chute, and much more.

It meets Part 103, weighing in at 275.4 pounds.  (Limit is 278.)

Here's a front on view, showing off the engine:

Front view of Belite Ultralight Airplane, with 50HP Hirth

And here's how Belite Electronics look, in the panel.

Instrument panel in Belite ultralight airplane


This plane even has strobes and position lights:

Strobe and Nav lights on Belite ultralight airplane
The interior pilot seat looks very sharp.  We haven't yet put the carpet on the floor, but that's coming too.

Interior of Belite ultralight airplane

There are many, many more photos showing all kinds of details of this airplane on Flickr.  Have a look.  Let me know what you think.

Sunday, October 10, 2010

Wichita's Aircraft Industry: Time for Reinvention?

In today's Wichita Eagle (Sunday, 10/10/10), a letter to the editor, from me:

Sedgwick Country Commissioner Gwen Welshimer presented a strong case for reinvention of Wichita's aviation core at last week's commission meeting.

In a presentation designed to help Wichita understand that it remains at a tipping point for its aviation future, she articulated the need to pay attention to developments in aviation — specifically in the light sport and ultralight niches — so that Wichita may continue to call itself the "Air Capital of the World" for decades to come.

It is disheartening that appropriate investments in the grassroots of our aviation industry were not made years ago. Instead, innovative small aircraft designs have been announced in many other cities and from many other countries. (Europe has become a hot spot for aviation technology development.) Some of these innovations are producing orders along with jobs.

All of these developments are in harmony with what this city already builds and sells — the world's greatest general aviation airplanes, jets and airliner components. But the smaller, less-expensive products rebound first from difficult economic times, and they are lacking from our community's collective product offerings (with the exception of Cessna Aircraft's Skycatcher and Belite Aircraft's "254" and derivatives).

Welshimer should find support from our community for the development of programs that will enhance the ability of our entrepreneurial private sector to create new aviation products and resulting jobs. Will she?

JAMES WIEBE
CEO
Belite Aircraft
Wichita


Read more: http://www.kansas.com/2010/10/10/1535343/letters-to-the-editor-on-incentives.html#ixzz120aM0WKV

Tuesday, September 28, 2010

a Hayfield Landing Highlights Belite's Utility

Long time readers of this blog may be aware that I have had training in mountain flying.  I've been to Idaho many times, and I've enjoyed the skills I've acquired through mountain flying school and through practice into short, odd airfields.  A recent post on this subject concerned several camping trips into the Thomas Creek airstrip.  Another post covered, among other thing, a series wasp bites and and description of the gnarly final approach into the Shearer airstrip, deep in the Selway-Bitterroot wilderness in Idaho.

I enjoy flying into tight, short airfields that curve, hug terrain, pass by trees, and slope uphill.  Ideally, they end in the side of the hill (and offer good camping and fishing nearby).

There is a hayfield next to our primary runway that offers some of these characteristics.  It slopes uphill.  It has a nice collection of trees.  It has bumps.  It has quite a bit of grass and weeds.  It is relatively short.  It is 'unimproved'. 

It is an ideal location for showing the landing capabilities and utility of our airplane.  The rough ground is a great demonstrator for our spring landing gear.

I wanted to demonstrate a nice 3 point landing, uphill, through the hayfield.  I asked my able assistant Gene Stratton to standby and take pictures.  I promised him a series of approaches into landing.  As I 'dialed in' the strip, I was able to establish a final approach of just a few feet over the weeds at the beginning of the field.  (Good mountain flying technique suggests the ability to hit a 50 foot spot... every time.  You can do that with a Belite.)

The photos show the story.

Hayfield Short Final, over the weeds.  I love this picture.

Over the 'numbers', field slopes uphill from here.  Another great pic.

Wheels kiss down on the Hay
Another approach, a little higher

Rollout in the hay, uphill.

Engine shutdown after taxi back
I'm posing by the Superlite

Belite Superlite poses in the grass, by the trees.  Where's the trout stream?
 This flight occured on September 28, about 1:30 in the afternoon.  I tracked down final, adjusting for the crosswind.  (Gene and I talked about my final approach crab angle after we debriefed on the ground, post-flight.)  Winds were out of the north, 12 knots gusting to 19 knots.  Engine power was set at about 35HP, even though the big Hirth develops 50HP when it's fully unleashed.  Landing direction was ENE; about a 50 degree crosswind.  FWIW, Wichita (KICT) Metar weather was:

       KICT 281753Z 01012G19KT 10SM SCT044 
            SCT150 SCT250 24/13 A2998


If you are a potential purchaser, you might compare our Belite with other less capable ultralight aircraft that have stiff gear and no crosswind capabilities and no off-field capabilities and no ChromAloy steel in their structure -- in other words, ultralight aircraft that lack safety, strength, and fun.

A Belite exudes utility and usefulness, and is a blast to fly.

      --  Photo credits: Gene Stratton.

Wednesday, September 15, 2010

Flying the Belite Ultalight Aircraft - Part 1

Editor's Note:

I recently returned from a heavy work schedule and from a great Alaskan vacation! 

My last post was an excellent article by Earl Downs on the Belite.  It provided a great view of the flying qualities of the Belite.

Many people want to know how to transition to flying a single place ultralight airplane, such as our Belite.  This particular post will help you gain that knowledge!  Although originally written years ago by another author, I have been graciously granted (anonymous) permission to update it to reflect our Belite ultralight aircraft.

Enjoy the reading....  Enjoy the learning... and enjoy the flying!

Published in three parts


Flying the Belite Ultralight Aircraft - Part 1

by James Wiebe, CEO
Belite Aircraft


General Flight Characteristics

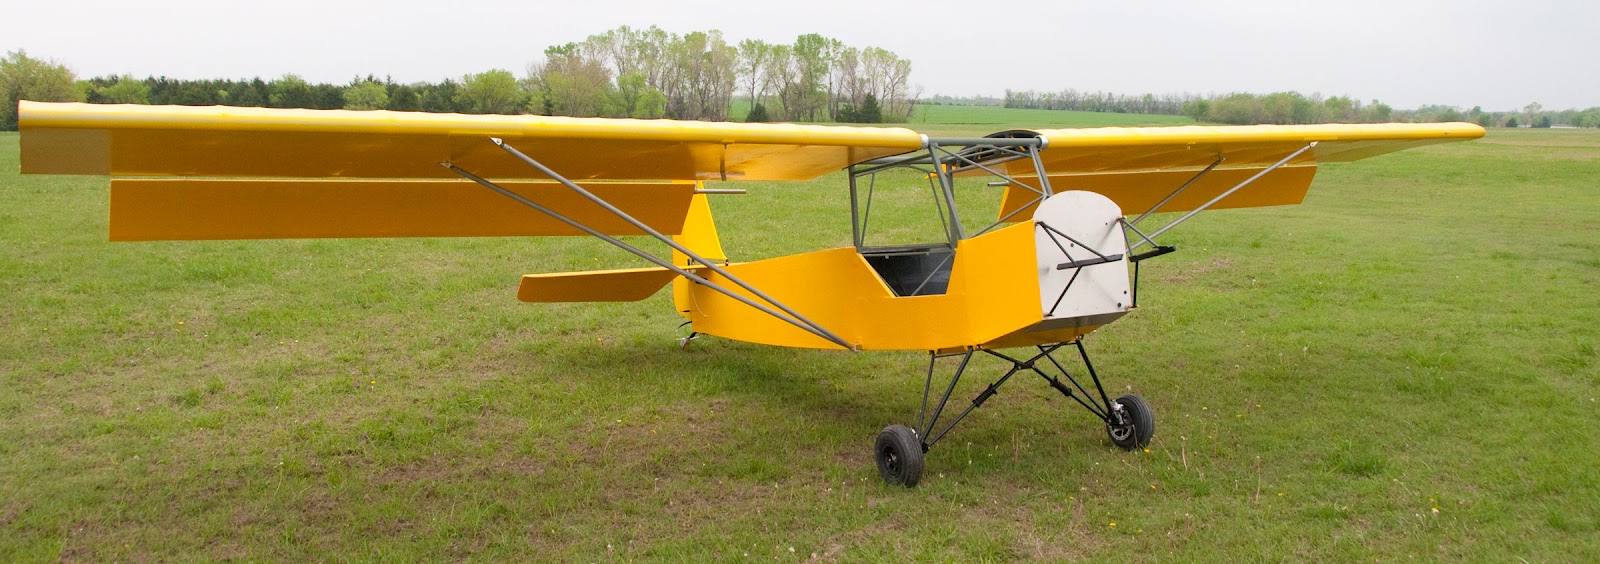
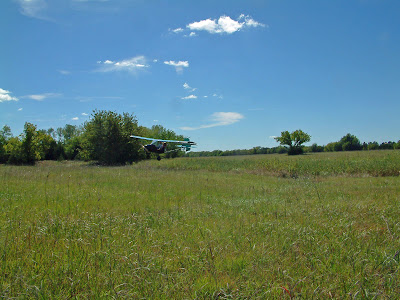
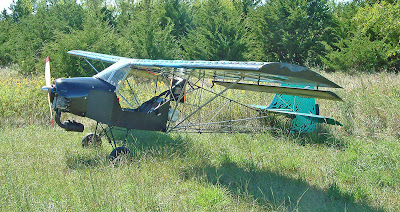
The Belite 254 / Superlite / Trike (hereafter, collectively referred to simply as: 'Belite') is first and foremost, a very real airplane, requiring competent flying skills to takeoff, fly and land.  In return, it offers a genuine flight experience, with none of the compromises associated with traditional ultralight aircraft and FAR Part 103 legal designs.

Most of the takeoff and landing comments below refer to the taildragger versions -- the Trike version is even easier to land.

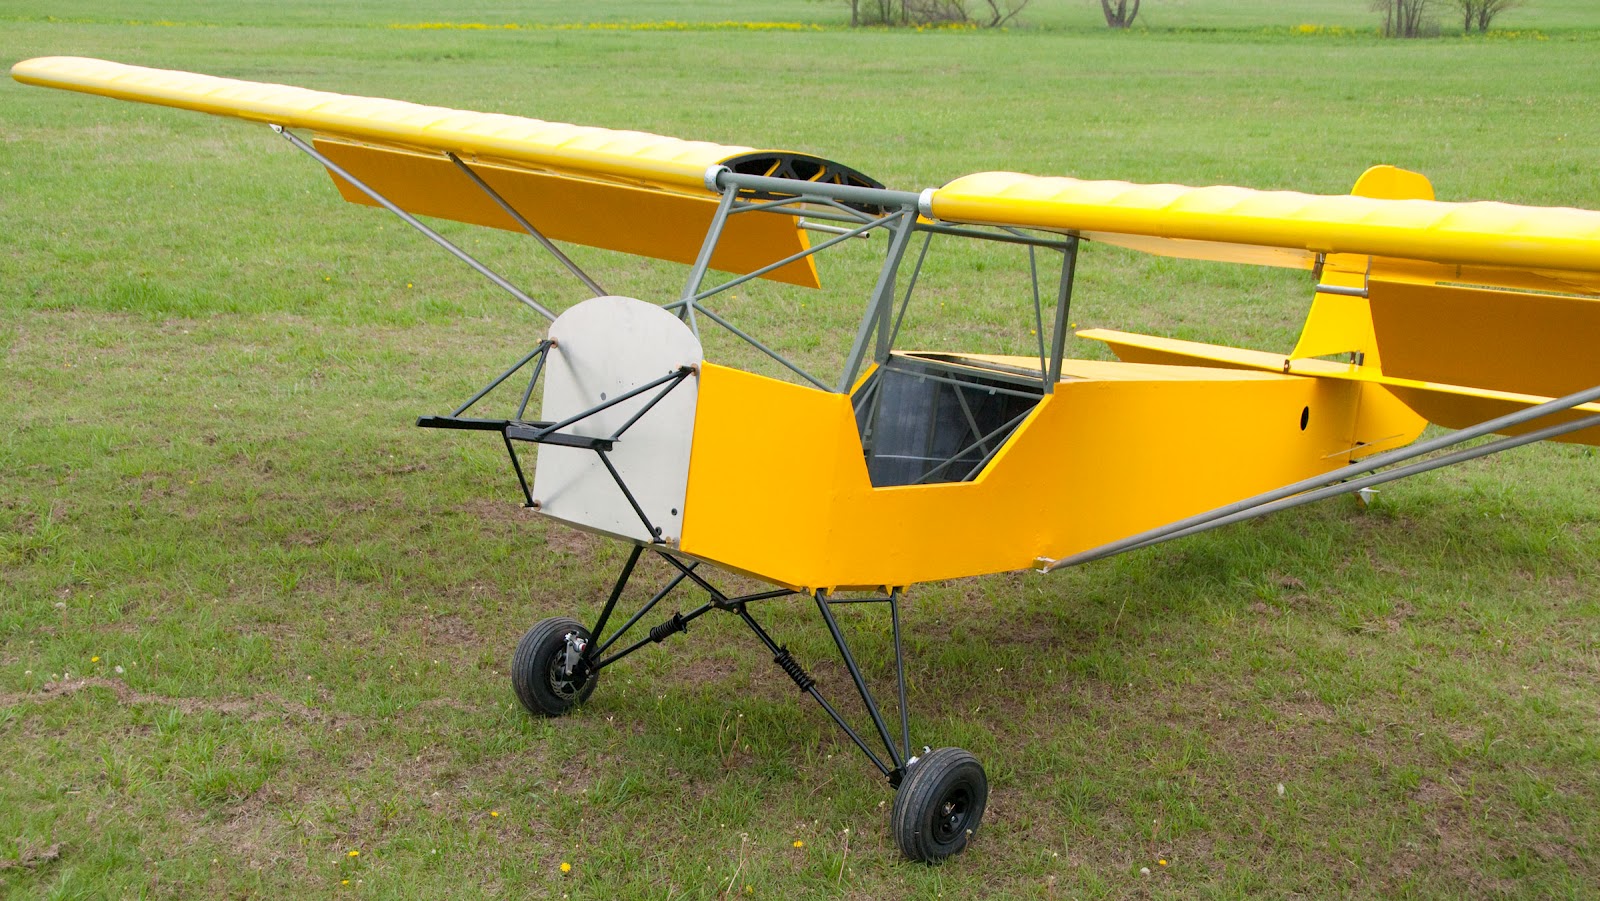
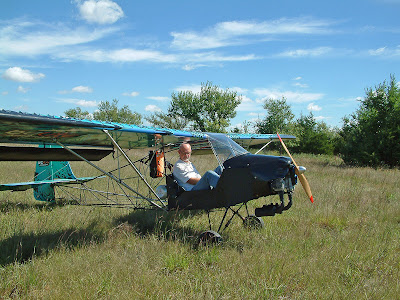
The Belite utilizes a standard three axis flight control system consisting of flaperons (ailerons that also act as adjustable flaps, through the use of an ingenious flap / aileron mixer).  It also has a conventional elevator and rudder.

The ailerons and elevator are operated by a conventional control stick, while the rudder are moved through the use of independent rudder peddles.  Any pilot familiar with aircraft such as a standard Kitfox, Piper Cub (or common derivatives, such as the CubCrafter), or Aeronca Champ will find the cockpit to be a familiar and friendly environment.  The flap function is provided by a four position flap lever that intermixes with the aileron control to 'droop' the flaperons.

Additionally, independent mechanical heel brakes are used to both stop and steer the Belite during ground operations.  An optional electric elevator inflight trim system provides for completely neutral flight characteristics during cruise, allowing hands off operation for brief periods of time, such as when taking photographs.  Back pressure is used on the stick in order to maintain a normal approach speed.  All flight controls are lite and very responsive at all speeds.

(For an independent extensive flight review of the Belite, see the excellent article by Scott Severen, published elsewhere on this blog.)

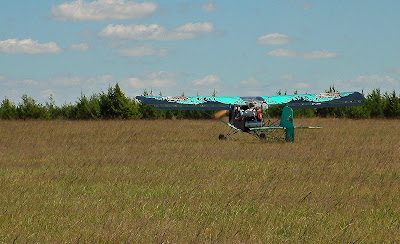
The tail-wheel configuration of the Belite does not present any unusual challenges during takeoff or landing.  The large rudder is very effective and little, if any, differential braking is needed to control the landing rollout.  In fact, customers preferring to fly their aircraft without brakes will be comfortable, especially when operating off of grass airstrips with light crosswinds.

Absolutely no differential braking is needed on the takeoff roll due to excellent rudder effectiveness.  Basic tail-wheel training in a Kitfox, Cub, Champ, Cessna 120/140, Citabria, or other tail-wheel light aircraft should serve to prepare you to handle the Belite.  Differential braking works well to steer the Belite during tax and forward visibility on the ground is unrestricted.  'S' turns are generally unnecessary.

As with the operation of all airplanes, the pilot should be current and qualified.  You should not attempt to fly the Belite unless you would feel absolutely comfortable soloing the airplane you have been flying for tail wheel proficiency.  The EAA can provide help with transition instruction in a taildragger and with 'first flight' issues.  You are encouraged to secure as many resources as possible to help with your transition.
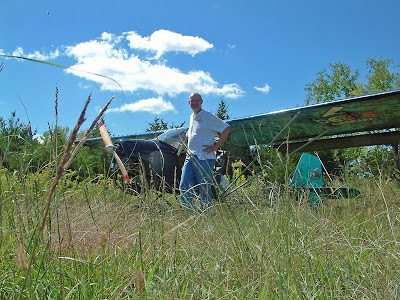
Ground Handling

The Belite utilizes differential heel braking to maneuver the airplane.  The heel brakes will cause the airplane to turn in the direction in which force is applied; left braking makes the plane turn left; right braking makes the plane turn right; braking both sides causes the plane to slow down.

Do not try to turn the airplane from a dead stop by locking a wheel and then adding power.  The airplane will turn much more easily if the plane starts moving slowly first, then applying braking to the appropriate side.  Once a turn is started, the momentum of the turn will tend to keep the turn going.  Once you are taxiing, the rudder alone may be all that is needed to steer your Belite.  As with all tail wheel airplanes, it is a good idea to center the tail wheel when you come to a stop.  This practice will make it much easier to control when you start taxiing again, or when you start your takeoff roll.

There may be circumstances when taxiing in tall grass or on a soft surface that make it difficult to swing the tail when differential braking is applied.  There is an old trick from the day of tailskids that may help out.  If the tail wheel is really bogging down, add sufficient power to get the plane moving, then push the control stick forward (keeping the power up) and then apply brake and full rudder in the direction you wish to turn.  The forward stick will lighten the load on the tail wheel and the rudder will help push the tail around.  Be very careful when trying this, as you could blow a lot of dirt around or upset airplanes behind you.  Always be courteous to other airplanes and pilots.

A note of caution:  one must be very cautious when taxiing in windy conditions.  The light weight and low wing loading of the Belite makes it susceptible to being upset by ground winds.  Unless you have exception skills, fully understand the risks, and (perhaps) have wing walkers available, do not taxi your Belite in winds exceeding 12 knots (15 mph) or greater.  Rapid ground turns should be avoided under all conditions.

Like any airplane, appropriate taxiing technique is important.  The flight controls can be quite effective in helping the Belite ultralight aircraft safely taxi.  When taxiing into a headwind, hold the control stick full back to help keep the tail on the ground.  A tailwind requires to the stick full forward; this will help keep the tail on the ground.  With the quartering headwind, move the control stick into the wind, as if trying to turn into the wind.  With a quartering tailwind, move and hold the control stick away from the wind, as if trying to turn away from the wind.  If the wind is straight over the nose or tail, keep the ailerons centered.  These positions will help keep the wing from being lifted by the wind.

You should be completely comfortable with taxiing, braking, and turning before proceeding to takeoff.  I say again:  have total comfort with ground handling and taxi operations before proceeding to takeoff.

Take Off

Your first takeoff should be made from a runway that is both wide enough and long enough to accommodate errors.  It should also be made from a runway without pressure from other aircraft operations.  Do not make your first takeoff with space restrictions that require maximum performance.  Perform a thorough preflight; make sure that the engine is warmed up and is showing correct temperatures, RPMs, mag checks, etc.

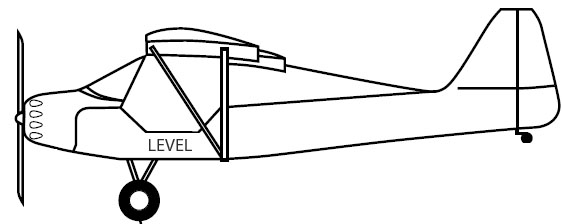
Align your Belite on the centerline of the runway and make sure the tail wheel is centered.  With the brakes locked and control stick held fully back, smoothly increase the power to approximately 75% of full power.  Release the brakes and continue to smoothly increase power to full throttle.  You will immediately see that the rudder is fully effective; you can control direction by use of the rudder pedals.  You won't need to use the brakes.  Keep the ailerons (flaperons) centered.  Directional control on the ground is controlled by your feet, not your hands.

Shortly after applying full power, you can push forward on the stick, and the tail will raise off the ground into a traditional level attitude.  Keep the nose straight (using the rudder pedals), and as the speed passes 40 to 45mph, you'll be able to pull the stick back a little, and the airplane will fly.  Depending on engine power, the total time from brake release to liftoff is about 5 or 6 seconds, depending on field elevation, winds, temperature, aircraft weight, and engine selection.  In a strong breeze, a takeoff roll of well less than 100 feet is an easy matter.

Immediately at and after liftoff, the flaperons become very important.  You'll use the control stick to level the wings.  Concentrate on level wings and a slight climb attitude.  I enjoy climbing to the top of ground effect (about 30 feet off the ground), then briefly leveling off and continuing climbout at a stabilized Vy speed, which is about 50mph.

As you gain more experience with the thoroughly enjoyable takeoff characteristics of the Belite, you will find that it also takes off very well in a three point attitude.  The basic procedure is the same, but instead of pushing the control stick forward, you simply place the stick in a centered, neutral position.  The Belite will fly off the ground when it is ready, in a tail low attitude.  Make appropriate minor pitch adjustments as required to establish a climb.

Don't climb out too rapidly -- never climb out below Vx (about 40mph); if your density altitude is high, or your weight is heavy, your climbout speed should be at Vy or higher.  Remember, you are flying the airplane.

Continue to Part 2 by clicking here

Sunday, August 8, 2010

Improving strength and beauty in the cabin wing root of an ultralight aircraft

Both of our demonstrator ultralight aircraft (Belite Trike and Belite Superlite) made it home from Oshkosh and are going through a small amount of improvement and upgrading.

I decided to improve the rib attachments from the fuselage to the Lexan upper cabin.  This is an area that is subject to abuse, because every time the wings are folded/unfolded, the cables drag through this root area.

We had been using some carbon fiber ribs for this interior cabin area, and as it turns out, they are not as ideal as I'd hoped.  The movement of the cable over the ribs was cracking these two interior ribs.

So, the first thing we did was remove these two ribs from the left and right side at the top of the cabin.  As a result, the upper lexan windshield lost its support:


In order to replace them, I started with two our our CNC cut baltic birch plywood ribs.  Here is what one of them looks like, before modifications:


It's a good looking piece of wood.  In order to fit in the upper cabin area, the tail of the rib needs to be cut off.  And each of the round spar attachment areas needs to be enlarged.  So we lopped off the tail and enlarged the spar holes.  And we glued on a reinforcement piece of plywood.  Now it looked like this (one rib shown next to original CNC rib, showing tail cut off and spar holes enlarged):


Another reinforement 'plug' also needs to go in each end of the rib, but that won't be visible until later.  Here's two modified ribs, showing left and right ribs:


There are two steel ferrules on each side of the upper cabin which line up with pins from these ribs.  We place the rib up to the ferrules, and mark the locaiton of the alignment pins before drilling out the holes.

Now it's time to mark the locations of the alignment pins.  Here's the front end of the rib, with the hole location marked.:


And here is the rib, test fitted with the two 1/4 inch pins inserted in the holes. You can see the rib fitting perfectly under the upper cabin lexan windshield.


Here's another shot of placement being tested:


After fit is verified, additional wood plugs to the rib.  They are fitted and glued in.   Then excess wood, pins, and glue is removed using a scroll saw and sander, providing a final rib:


Let's look at the ends from the other side as well.  The pin is super strong (although this is not a load bearing point) and the whole assembly is looking sharp:


After placement back in the wing, a carbon fiber strip is used as a load washer across the length.  Screws are drilled and used every 3 inches.  The lexan needs to be trimmed, but here's how it looks:


So let's remove it, sand it up and stain it, so the wood will last many, many years:


And let's install them back in the airplane upper cabin.  To do this, as I said, we used a #8 screw with flat head every 3 inches.  We also used a strip of carbon fiber 1 inch wide, acting as a load washer across the length.  The lexan was ground off (which I actually did on a test fit BEFORE I stained the wood) and the whole thing is looking very sharp, and very sturdy:


After wing reinstallation, here's a photo of the cables running from the wing, through our new improved cabin root rib:


All very sharp looking.

Friday, July 23, 2010

Electric Elevator Trim on Ultralight Aircraft

First a friendly reminder:  This blog has many, many posts on many different topics.  Please explore the various posts -- I've written on all kinds things -- some serious, some contemplative, some informative.  Have a look around!  Now, on today's topic:  Electric Elevator Trim Tabs on Ultralight Aircraft.

Another item on our price list which is kind of unique is our electric elevator trim.  I thought I'd show a few pictures as to how we do it.

One of the joys of flying in an ultralight aircraft (such as our FAR Part 103 Belite Aircraft) is taking photographs.  In order to do this, I like to fly 'hands free', without the plane diving or climbing.  And I like to do it at various throttle settings, which means that I need a flight variable trim system.  There's a variety of ways to do this, but here is a system which meets all of the flight trim objectives AND provides an additional redundancy of elevator control, in the event of an elevator control system failure.  Just like a real airplane...  Jumping to what it looks like when it's all done, here's the electric elevator trim and manual rudder trim, as installed on our Belite Black Dragon Superlite (YES, the paint job is spectacular...):


The rudder trim is permanently set, and when properly set eliminates any left or right rudder tendencies.  (The big engine requires a lot of right foot, without rudder trimming, so I LIKE the rudder trim.)  The elevator trim uses an electric servo (designed by Belite) and a custom designed controller circuit board (which we'll get to in a few moments.) 

Now let's back up and look at these two trim tabs in the paint shop:


Well, that's kind of a boring picture.  But it does show the general clutter around the workshop fabrication bench, as well as our big battery charger.  So let's move on to some closeups.  Here's a pic of the rudder trim, prior to placement on the rudder:


And here's a shot of the elevator trim tab, complete with hinge, servo, linkage and control horn.  (Some of which is covered by painted masking tape):


This trim tab weighs about 9 ounces, as pictured.  With cable up to the cockpit, and controller board, the entire weight is about a pound.  The big holes which are drilled on the attachment tabs are used to tie wrap this to our elevator.  Let's mount this trim tab on the elevator:


You can clearly see the black tie wraps, along with the electric cable which has been snaked around the back of the elevator.  The wires have not yet been hooked up, but the linkage is clearly visible from the servo to the control horn.

Now let's move up to the cockpit, and look at the panel:


The big red push button switch is for the electric starter relay, the two red toggle switches are magneto kill switches (left and right) for our big Hirth F23 50HP engine, the white switch is the master avionics switch, and the black toggle switch is our electric trim switch.  It is shown in the central (neutral) position.  Moving it up causes the elevator trim servo to move one direction, while moving it down causes the trim to move in the other direction.  VOILA!  Easy elevator trim.

Now let's take a sneak look behind the panel, and see what's attached to that black toggle switch:


You can see a module which is 'shrink wrapped' and attached to the toggle switch.  It contains a small circuit board which regulates power and controls power polarity from the toggle switch to the trim servo.  This entire design is a product of Belite and is available on our assembled aircraft for $200.  This includes the servo, the electric trim tab, the controller board, the wiring, all installed.

You can see the Black Dragon Superlite, complete with electric trim and several other surprises, at 2010 Oshkosh.  Please come by our booth in the North display, and we also have a booth in the south Ultralight area.