Wednesday, November 28, 2012

Belite Ultralight Aircraft Flying with 4 Stroke VW!

Please note: James' blog has moved to a Wordpress site. To access it, please visit http://jameswiebe.wordpress.com/. All posts have been transferred to the new site, and all new posts will only be accessible via Wordpress. Thank you for your interest!


So, here's the short version:  I successfully flew a Belite UltraCub with a 1/2 VW four stroke engine earlier this afternoon.  Over the last couple of months, I'd done some very low altitude hops, but nothing that really qualified as a flight.

Today, success....

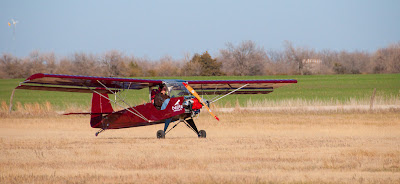
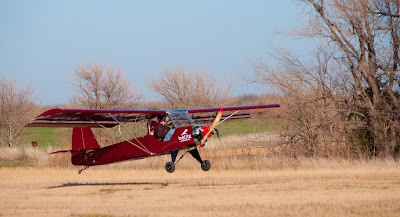
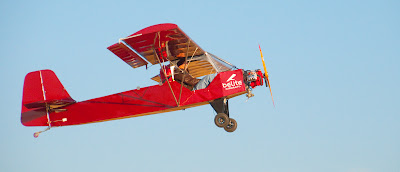
With the growling 45HP VW engine sounding like a real aircraft engine, the plane accelerated crisply and was flying... in about 150 feet.  Maybe less.  I've got the photos to prove it.  They are below.

I'd fought some very significant problems related to the center of gravity.  The heavy engine with a bad engine mount made the plane want to nose over, (which is thrilling), but is also an excellent way to check the robustness of the landing gear and the new cabin design.  We redesigned the engine mount to solve the problem, significantly changing the center of gravity.  A series of low altitude hops earlier today proved that the design modifications had resolved the problem, so there was nothing left to do but to fly this new plane around the pattern.

Gene manned the Nikon, taking great takeoff and flight photos.

BTW, the turtledeck is not installed, but has been finished and will be attached and flown soon.

There is a much bigger story to be told here.  More in the days ahead.
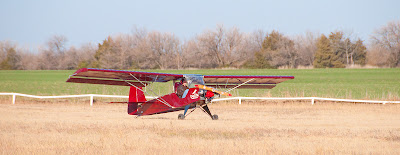
Belite Ultralight Aircraft with 4 stroke VW engine

Belite Ultralight Aircraft with 4 stroke VW engine, tail off ground
Belite Ultralight Aircraft with 4 stroke VW engine, takeoff!
Belite Ultralight Aircraft with 4 stroke VW engine, in flight
Belite Ultralight Aircraft on maiden flight
Redesigned Engine Mount solved CG problem (and lightened the airplane)

Rear Fuselage Improvements

Please note: James' blog has moved to a Wordpress site. To access it, please visit http://jameswiebe.wordpress.com/. All posts have been transferred to the new site, and all new posts will only be accessible via Wordpress. Thank you for your interest!


We're now shipping rear fuselages with triangular gussets and a truss structure across the bottom of the fuselage.

The prior version had an aluminum skin, which we are  no longer doing.

We include enough aluminum angle material in our kits (along with precut gussets) to make a truss structure across the top of the fuselage as well.  That part is up to you: just match the bottom truss structure.

Alternatively, I've flown a test aircraft without the truss structure on the top and bottom:  just with medium weight fabric covering the fuselage.  I put the fabric on a 45 degree bias to the fuselage.  Worked great.

See the separate walk around videos on youtube:

http://www.youtube.com/watch?v=x1ca3TLWnJ4

http://www.youtube.com/watch?v=cevo0Y-Vyb4

Monday, November 12, 2012

How to attach a Belite instrument dimmer

Please note: James' blog has moved to a Wordpress site. To access it, please visit http://jameswiebe.wordpress.com/. All posts have been transferred to the new site, and all new posts will only be accessible via Wordpress. Thank you for your interest!


Belite LED instruments are very bright, completely suitable for viewing in daylight, but they do come with a 'dimming' function for dusk conditions.  Here is an example Belite LED instrument:

Belite LED instrument:  Turn Coordinator with solid state gyro

Each instrument has a yellow wire which may be attached to a dimming potentiometer, so that you can control how bright the LEDs are.

We've had several tech support inquiries on how to attach that wire.  Here's the answer:

A)  If you never plan to fly in dim light conditions, just leave the yellow wire unattached.  Your unit will always be at full brightness.

B)  If your bird has navigation lighting (EG: position lights) you can attach the yellow wire to them.  Therefore, if your position lights are turned on, your LED indicators will be fully dimmed.

C)  If you desire to have variable control over the dimming intensity, the yellow wire may be attached to a separate potentiometer (not supplied by us) to provide control.  You'll need a potentiometer (10K ohm suggested) and perhaps a knob for the potentiometer, and you'll want to mount the potentiometer in your instrument panel.  A suitable potentiometer is from Radio Shack, part # 271-1715, and they look like this:

Potentiometer.
The potentiometers have three connections.  You'll need to connect the center one to the yellow wire; and one side to ground, and the other side to Switched +12 volts.  (From your avionics master switch, for instance.)  This allows the potentiometer to 'sweep' all the way from ground up to twelve volts, allowing you to select the proper intensity level of your LEDs.  If you have several of our instruments, just connect all the yellow wires together.

Your Belite instrument still requires its own power.  You can hook it up to the same +12v source (red wire) and the ground (black wire).

If you don't have access to a Radio Shack, and if you are so inclined, Digi-Key sells bazillions of variable potentiometers.  A suitable Digi-Key part # is: 3852A-202-103AL-ND; but the Radio Shack part is a lot less expensive.

Even More Technical info:

The yellow wire going into the Belite instrument is not connected directly to the LEDs.  Rather, it is connected to a small microprocessor inside the instrument, which analyzes the voltage level and controls the LEDs by varying the amount of time they are turned on.  This happens so quickly that your eye sees it as a dim condition, but its actually a very rapidly flashing light with a varying duty cycle.  Many LED lighting systems with variable intensity work this way; for instance; LED brake lights on cars.
 

Saturday, November 10, 2012

Wing Build Update #2

Please note: James' blog has moved to a Wordpress site. To access it, please visit http://jameswiebe.wordpress.com/. All posts have been transferred to the new site, and all new posts will only be accessible via Wordpress. Thank you for your interest!


Back to my wood wing build update.  It's another series of pictures, and we're picking up exactly where we left off a few days ago.

(My earlier post on this wood rib wing topic may be found here).


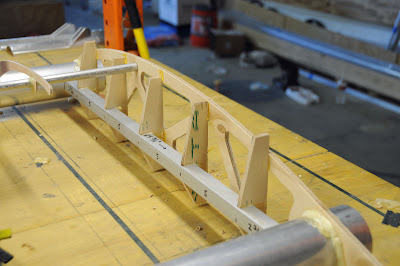
Clamping on the anti warp anti crush tubing.

Clamps removed showing anti crush anti warp structure.

Gluing 4 inch wood gussets, 1/4" thickness, to ribs.
Glue up for gussets, close up.

Trailing edge riveted in place.
Slot cut on some ribs to fit flaperon hard points.
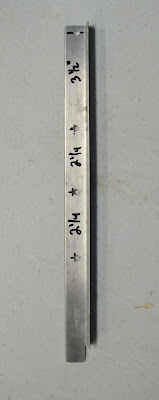
Flaperon attachment right angle material, with spacing for 3/16" rivet holes shown.

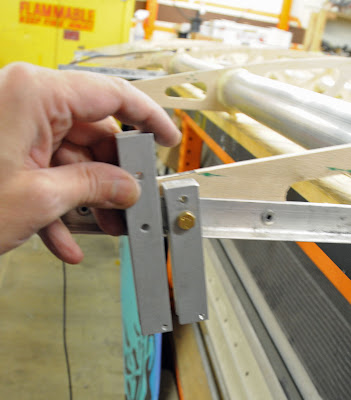
Flaperon attachment clamped in place, showing 1/4" overhang at rear of trailing edge.
Flaperon cable post, showing how it has to be cut and drilled.
In the above photo, the post is backwards.  This was fixed later in the assembly.  Also, the mark barely visible on the top of the rib is 6" from the trailing edge.

Use 3/16" rivets and large backing washers.
Post bolted in place using AN3 bolts, cut down washers, spacers as necessary.  This post is still backwards.  
Right angle with two 1/8" rivet holes each side.  3/4" x 3/4 x 3/4, or larger.
Rivet four right angle braces in place.  (Two at each end of rib; both end ribs.)

Complete anti-crush anti-warp structure in place on end rib.
Note that the wood 'riblets' have been trimmed.  Consider using a deeper cut angle on the riblets than as shown.  This will aid in covering the wing with fabric later on, so that the riblets don't interfere with fabric.

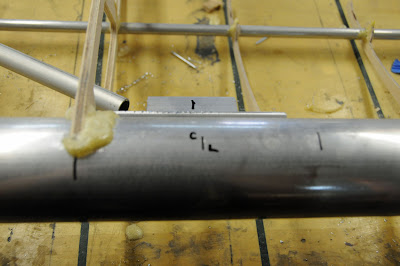
Hardpoints for anti-sail tubes will be riveted on spars.  Exact placement determined by tubing lengths.
The length of the anti-sail tubes is 2', 4', 3', 3' 1", and 2'.  For these tubes, we're using 3/4" thin wall aluminum tubing of a soft temper.  The ends flatten easily in a vise.

Anti-sail hardpoint riveted in place.
Anti-sail tubing layout.  2', 4', 3', 3'1", 2' lengths from near to far.
Anti-sail hardpoint with AN3 bolts.  Use appropriate washers to ensure clearance.
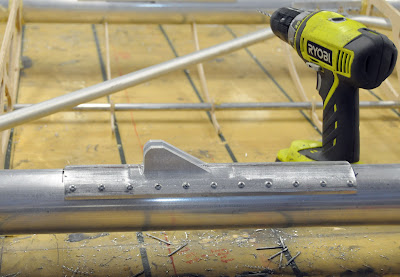
Lift strut machined attachment, riveted in place.
This is one step to check, recheck, and triple check the placement of each lift strut fitting.  This is also one area that I insist on using aircraft quality rivets, with their higher shear strength.
Trim plates riveted in place.  

Another view of trim plates.  Note spacing washers under plates/rivets to ensure straight / parallel trim plates.
Pitot tube installation using 1/4" aluminum tubing and grommets.
Routing of pitot tubing line.
Another view of pitot tubing attachment.  Pitot tube may extend and retract.
Trailing edge material butt joint.  Sweet and simple.
What's missing from this post?

a)  Never did show the installation of the jury strut fittings.  I'll add that.
b)  Didn't show the wooden structure being painted with spar lacquer.
c)  Didn't show the fabric covering.